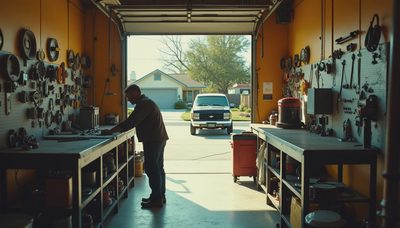
A bench vise is one of those garage tools you do not appreciate until you need both hands to hold a stubborn part. I have used one for everything from cutting threaded rod to rebuilding old hand planes, and I have also mounted one badly enough to make the entire workbench shake. I've screwed this up so you don't have to. The right vise turns a basic bench into a useful repair station, but the wrong size or mounting location can make every job frustrating.
What a bench vise actually does well
A bench vise holds work securely while you saw, file, drill, bend, or assemble it. That sounds simple, but solid clamping changes the quality of the work. Instead of wrestling a bracket against your knee, you can concentrate on a straight cut or clean hole. A good bench vise also protects your hands when a part has sharp edges, heavy rust, or awkward geometry.
For a typical attached-garage workshop, I like a vise with a 4- to 5-inch jaw width, roughly 4 inches of jaw opening, and a cast-iron body. That size handles plumbing fittings, lawn equipment parts, hardware, and most automotive repairs without eating half the bench. A 6-inch model is worthwhile if you regularly work with heavier steel, but it needs a stronger bench and more room to swing the handle.
Do not confuse jaw width with jaw opening. The width measures across the jaws; the opening tells you how far they separate. Throat depth, which is the distance from the jaw tops to the rear of the body, also matters when you are holding a wide plate. Product listings often highlight only the biggest number, so read all three measurements.

Choosing the right style for your garage
A fixed bench vise is the straightforward choice. It bolts firmly to the work surface and gives you the most predictable force. A swivel base lets you rotate the vise, which is convenient when filing or working around a bend, but it adds height and another layer that can loosen. I prefer a fixed base for heavy work and a swivel base when the bench is shared for woodworking and metal repair.
Look for replaceable serrated jaws held by screws. Eventually, every bench vise jaw gets nicked or loses its bite. Replaceable inserts are cheaper than replacing the whole tool. Smooth jaw covers are useful for finished aluminum, brass, or painted parts, while serrated steel jaws grip rough stock better. Magnetic jaw covers are handy for occasional protection, though I would not trust them for heavy hammering.
A pipe vise is a separate tool with curved jaws designed for round pipe. It is excellent for plumbing work but not a substitute for a general-purpose bench vise. Likewise, a small hobby vise can be useful for model work or electronics, but its light body will slide across a garage bench when you apply real force.
How much should you spend?
For occasional household repairs, a basic 4-inch vise from a reputable hardware brand often lands around $60 to $120. Expect modest fit and finish, but it should still clamp reliably if the body is solid and the screw runs smoothly. The $120 to $250 range is where most homeowners will find the best balance of size, durability, and replacement parts.
Above $250, you are paying for heavier castings, better machining, quick-release features, or professional-duty construction. Brands such as Wilton, Yost, and Irwin offer models across different price levels, so compare the actual body weight and jaw capacity instead of buying by brand name alone. A 55-pound vise is built for a different job than a 15-pound model, even if both advertise 5-inch jaws.
I bought a cheap import vise early in my remodeling years because the color looked good and the price was hard to ignore. The jaws were not parallel, the swivel base slipped, and the handle bent when I tried to straighten a small bracket. It lasted long enough to teach me the lesson. Spend money on mass and a good screw mechanism before paying for cosmetic features.

Mounting a bench vise without wrecking the bench
Mounting is where many garage setups fail. A vise needs to sit near the front edge of the bench so long work can hang below the jaws, but not so close that the mounting bolts split the benchtop. Position it where you can swing the handle freely and where the vise will not block drawers or a garage wall.
For a wood bench, use through-bolts rather than lag screws. I normally use 3/8-inch or 1/2-inch Grade 5 bolts with large washers or a steel backing plate under the top. A single layer of 3/4-inch plywood is not enough for serious clamping. Add a second layer, a 2-by-4 frame, or a metal mounting plate beneath the vise footprint.
Tighten the bolts firmly, then test the setup with a piece of scrap steel. If the bench flexes, reinforce the structure before using more force. The goal is for the vise to hold the work while the bench stays still. If the whole top lifts or rocks, you have created a problem that no heavier vise will solve.
Bench height and daily usability
Mount the jaws around elbow height when you are standing comfortably. That is a useful starting point, not a law. Filing and hand-sawing feel better with the jaws slightly below the elbow, while drilling or hammering may feel more controlled with a lower setup. In my 36-inch-high garage bench, the top of the jaws sits about 40 inches above the floor because the vise body adds several inches.
Leave at least 12 inches of clear space around the vise whenever possible. You need room for long boards, pipe, clamps, and your hands. Put a bright LED fixture over the work area, not behind your head. Shadows across the jaws make it harder to see a scribe line and easier to file the wrong edge.
Keep a small tray nearby for jaw covers, handle pins, and layout tools. A vise becomes much more useful when it is ready to use instead of buried under a cordless drill, extension cords, and the parts from last weekend's project.
Mistakes worth avoiding
Do not hammer directly on the vise handle. Use the handle normally and let the screw provide the clamping force. Do not extend the handle with a pipe, because that can damage the screw, nut, or body. If a part will not hold, improve the setup, clean the jaws, or choose a better gripping position.
Do not clamp delicate castings in bare serrated jaws. Use aluminum, copper, leather, or purpose-made jaw covers. Do not weld on a cast-iron vise unless you know exactly what alloy and heat treatment you are dealing with; a cracked body is not a successful repair.
Finally, keep the screw lightly lubricated and clear packed-in grit from the slide bars. Wipe away metal chips after each project. A few minutes of maintenance keeps the action smooth and prevents the vise from becoming another frozen garage fixture.
My practical buying recommendation
For most homeowners building a serious garage workshop, I would buy a 5-inch bench vise with replaceable jaws, a 4-inch opening, a solid fixed base, and enough body weight that it cannot be moved by hand. If the budget allows, spend around $150 to $250 and put another $20 into proper bolts, washers, and backing steel. That setup will handle mower repairs, small automotive jobs, hardware fabrication, and general household work for years.
Before ordering, measure the bench depth, check the mounting-hole pattern, and confirm that the handle will clear the wall and drawers. Then bolt it down properly instead of treating the vise like a temporary accessory. A well-mounted tool makes the whole garage feel more capable. Back to the bench.