A garage does not become a workshop because you hang a pegboard and sweep the floor. It becomes useful when the layout, lighting, electrical service, and power tools work together. After rebuilding my own garage three times and working inside more than 40 attached garages, I have learned that buying everything at once is the fastest way to create an expensive pile of plastic cases.
The better approach is to build around the work you actually do. A homeowner repairing shelves, framing a partition, or restoring an old workbench needs a different setup from somebody making cabinets every weekend. I have owned plenty of tools that looked smart in the store and sat untouched for years. I've screwed this up so you don't have to.
Start with the work, not the shopping list
Before buying power tools, write down five projects you expect to complete in the next year. My list usually includes garage storage, small repairs, trim work, and one project that involves sheet goods. That list tells you more than a glossy tool catalog. If the projects involve long boards, prioritize a saw and proper outfeed support. If they involve fastening, spend first on a reliable drill, driver bits, and a sturdy bench.
Battery systems deserve attention before individual models. Pick one voltage platform from a company with several tools you can realistically use. Milwaukee M18, DeWalt 20V Max, and Makita 18V LXT all offer broad ecosystems. Ryobi One+ is often a practical value for occasional homeowners because the battery platform covers many garage and yard tools. Batteries are not interchangeable across brands, so choosing on impulse can leave you buying chargers twice.
A useful starter setup does not require six batteries and a rolling cabinet. One drill, one impact driver, two batteries, and a charger can cover an astonishing amount of home work. Add saws only when a project proves you need them.

The first power tools worth buying
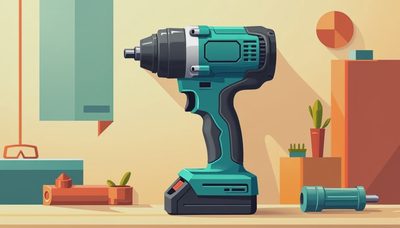
My first recommendation is a brushless cordless drill with a clutch, a comfortable handle, and a metal chuck. The clutch matters when you are driving screws into soft pine or assembling cabinets; it keeps you from burying the screw head or stripping the fastener. A drill in the $120 to $220 kit range is usually a better long-term buy than a bargain tool with a weak chuck.
Next comes an impact driver. It is not a replacement for the drill, but it handles long structural screws and stubborn fasteners with less strain on your wrist. Use the drill for controlled holes and delicate hardware, then reach for the impact driver when you are building a workbench or attaching framing lumber. Keep impact-rated bits in the case. Ordinary driver bits can snap under the hammering action.
A compact circular saw is more useful in a garage than many beginners expect. With a straightedge and a sharp blade, it breaks down plywood, cuts framing lumber, and handles shelves without requiring a permanent table saw footprint. I use a track saw for cleaner cabinet work, but a circular saw remains the practical starting point. Budget another $25 to $60 for a quality finish blade instead of relying on the blade included in the box.
Where corded tools still make sense
Cordless convenience is hard to beat, but corded power tools still earn their keep. A corded random-orbit sander is a good example. Sanding a tabletop or several cabinet panels can drain a battery quickly, while a $70 to $150 corded model runs continuously. Connect it to a shop vacuum with a dust separator, and you will spend less time clearing dust from the garage.
A corded miter saw can also be sensible if you regularly cut trim, studs, or repeated pieces. The saw itself may cost $200 to $500, but the stand and support wings are just as important. I once set a miter saw on two plastic bins because I wanted to start quickly. The setup rocked, the cuts were inconsistent, and I nearly sent a board across the garage. A stable stand with long supports is not optional.
For occasional work, borrow or rent a table saw rather than giving half your garage to one. If you eventually buy one, plan for blade clearance, outfeed space, and safe storage before it comes home. Power tools need room around them, not just room on a shelf.
Build the garage around safe use
The best power tools cannot compensate for poor lighting or an overloaded circuit. Put bright, evenly spaced LED fixtures over the bench and cutting area. A single bulb near the garage door leaves shadows exactly where a blade or bit is working. I prefer several 4-foot LED shop lights, mounted so the open door and vehicle do not block the work surface.
Use grounded outlets along the walls and keep cords away from walk paths. A dedicated circuit can be worthwhile for a compressor, dust collector, or larger saw, but electrical work should follow local code and be handled by a qualified electrician when needed. Do not defeat a ground pin or run a cheap extension cord permanently through the room.
Dust control deserves the same planning. Fine dust from sanding and sawing settles on shelves, door tracks, and your lungs. A shop vacuum with a proper filter, a cyclone separator, and a short hose is a strong starting point. Wear eye protection and hearing protection even for short cuts. The five minutes you save by skipping safety gear are not worth a damaged eye or ringing ears.

Storage matters more than another tool
A crowded bench makes every job slower. Store power tools where you can see them, lift them without moving three other cases, and return them after use. A shallow cabinet near the bench works better than a deep floor pile. Keep batteries off the concrete floor and away from extreme heat. I use a wall shelf for chargers, with a small tray underneath for batteries waiting to be charged.
Leave the most accessible space for the tools used weekly. The router I use twice a year can live higher up, while the drill, impact driver, sander, and tape measure stay within arm's reach. Labeling shelves sounds fussy until you are searching for a countersink bit with a board clamped in place.
Do not ignore the floor. A smooth, durable surface makes cleanup easier and keeps dropped screws visible. I painted my own garage floor once; six months later I tore it out after hot tires and moisture lifted the coating. A properly prepared coating or interlocking floor system costs more upfront, but it supports a workshop far better than bare, dusty concrete.
A buying plan that avoids regret
Start with the drill and impact driver, then complete one real project before adding anything else. That project will reveal whether you need a circular saw, sander, miter saw, or better clamps. Buy blades and bits based on the material you cut, not the largest assortment in the aisle. Ten good bits are more useful than a hundred dull ones.
When comparing power tools, hold the tool in your hand, check the battery cost, look at the warranty, and search for replacement accessories before paying. A sale price is not a bargain if the batteries are expensive or the model disappears from the manufacturer’s lineup. Established brands such as DeWalt, Makita, Milwaukee, Bosch, and Ryobi give homeowners plenty of support options, but the right choice depends on your projects and budget.
The goal is not a garage that resembles a contractor's showroom. It is a clean, lit, dependable place where you can finish a shelf on Saturday morning without hunting through boxes. Buy deliberately, build storage first, and let each project justify the next upgrade.
Back to the bench.