A garage becomes useful when it supports the work you actually do, not when it looks good in a photo. The right workshop essentials give you a solid place to cut, repair, assemble, store, and clean up without moving three piles every time you need a screwdriver. After working inside more than 40 attached garages, I have learned that a practical shop starts with the floor, lighting, power, and a bench. Fancy storage comes later.
I rebuilt my own garage three times before I stopped chasing clever layouts. The first version had a painted floor that peeled after one Ohio winter, a workbench that flexed under a vise, and one lonely ceiling light that left my hands in shadow. I've screwed this up so you don't have to. Start with the boring infrastructure, then buy tools that earn their space.
Start with the floor and working zone
Your floor takes more abuse than any cabinet. A bare concrete slab is serviceable, but oil, road salt, dropped sockets, and winter moisture will eventually stain it. I painted my floor with a hardware-store coating; six months later, hot tires lifted sections of it. If you want a coating, preparation matters more than the label. Clean, degrease, mechanically profile the concrete, repair cracks, and follow the full cure schedule. A quality two-part epoxy or polyurea system can cost roughly $4 to $10 per square foot installed, depending on repairs and local labor.
For many homeowners, interlocking PVC or polypropylene tiles are the more forgiving option. They can run about $3 to $8 per square foot, install over a reasonably sound slab, and let you replace one damaged tile instead of grinding an entire floor. Use a 3-foot by 6-foot anti-fatigue mat at the bench, but do not cover expansion joints or hide active moisture problems. Workshop essentials include a floor that can be swept quickly and a clear working zone at least 4 feet deep in front of the bench.

Build a bench that does not move
The workbench is the center of the shop. A 24-inch-deep top works for electronics and light assembly, while 30 to 36 inches gives you room for woodworking or small engine repairs. I prefer a 2-inch laminated hardwood top or two layers of 3/4-inch plywood glued and screwed together. A 6-foot bench is a useful starting size; if you have room, an 8-foot top gives you a clean assembly area beside the vise.
Anchor the frame to wall studs or the floor. A bench that shifts when you file a bracket will make every job irritating. Put the vise near one end, not in the middle, and reinforce underneath with blocking. A 5-inch or 6-inch bench vise handles ordinary homeowner repairs without consuming the entire top. Leave 12 to 18 inches of clear wall space above it for long clamps, a square, and frequently used hand tools.
One of the most overlooked workshop essentials is comfortable height. For general work, 36 inches is a good starting point. Lower it to about 32 inches for hand-planing or raise it toward 40 inches for detail work. Test the height with a scrap board before fastening anything permanently.
Plan power and lighting before storage
Do not install cabinets first and discover that every outlet is behind them. Map the bench, compressor, refrigerator, battery chargers, and door opener before electrical work begins. A dedicated 20-amp circuit at the bench is useful for a shop vacuum, miter saw, or portable heater, but do not assume one circuit can safely run several high-draw tools together. Have permanent wiring and new circuits handled according to local code by a qualified electrician.
Use several 4-foot LED shop fixtures instead of one bright center light. Place rows over the bench and along the vehicle bays, with the fixtures positioned to reduce shadows from your shoulders and hands. Neutral white light around 4000K to 5000K makes labels and scribe lines easier to see without turning the garage into a blue operating room. Add a plug-in task lamp at the vise and a magnetic light for vehicle work.
Power is one of the workshop essentials worth planning twice. Put outlets around 48 inches above the floor at the bench, higher if your cabinets require it, and include one near the garage door for a pressure washer or vacuum. Keep extension cords short, heavy enough for the tool, and off the walking path.
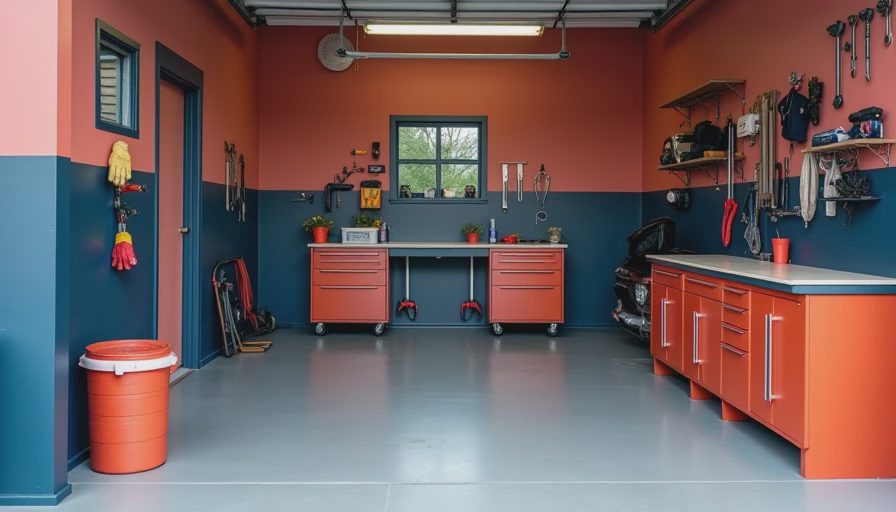
Choose storage for the tools you use
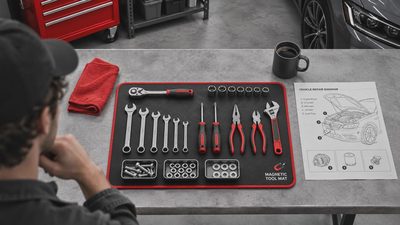
Storage should follow your work, not the other way around. If you repair bicycles, keep tire levers, pumps, hex keys, and lubricants together. If you work on cars, group sockets, torque wrenches, inspection lights, and fluid-handling supplies near the vehicle bay. A 7-drawer rolling cabinet is often more useful than a wall of shallow boxes because you can bring the tools to the job.
Pegboard is inexpensive and flexible, but it becomes frustrating when every hook falls out while you grab a hammer. Use a quality metal panel or French cleat system for heavier items. Store sharp blades, solvents, and automotive fluids in closed, labeled cabinets. Keep frequently used hand tools between waist and eye level; reserve high shelves for seasonal equipment and supplies you buy in bulk.
The best workshop essentials are visible enough to find and contained enough to clean. Outline boards can help during the first month, but I prefer shallow drawers for small tools because they prevent dust buildup. Leave at least 20 percent of every cabinet empty. A full cabinet on installation day becomes an overflowing cabinet by spring.
Safety belongs in the layout
Safety is not a poster above the bench. It is the distance, ventilation, and access you build into the room. Keep a clear path from the house door to the garage door, and do not store lumber where it blocks the electrical panel or water shutoff. Mount a multipurpose fire extinguisher where it can be reached before a fire reaches the exit. For fuel, paint thinner, and other flammable liquids, follow the container instructions and local storage requirements rather than improvising a cabinet.
Wear eye protection whenever you grind, drill, cut, or use compressed air. Hearing protection matters around a shop vacuum, impact wrench, or compressor, especially in a hard-surfaced garage. A half-mask respirator with the correct cartridges is not a substitute for ventilation when using coatings or solvents. Open the door, use an exhaust fan rated for the application, and never run a gasoline engine in an attached garage, even with the door open.
These workshop essentials also include cleanup equipment: a stiff broom, dustpan, shop vacuum with the correct filter, and absorbent material for spills. Five minutes of cleanup prevents a screw from becoming a tire puncture and keeps dust from settling into every tool drawer.
Spend the first $1,000 where it counts
A realistic starter budget can be divided into stages. Spend $150 to $300 on LED lighting, outlets, cord management, and a reliable task light. Allocate $200 to $450 for a sturdy bench, vise, fasteners, and a replaceable work surface. Another $150 to $350 can cover a rolling cabinet, wall storage, and labeled bins. Use the remaining money for eye and hearing protection, a shop vacuum, clamps, a tape measure, combination squares, screwdrivers, pliers, a socket set, and a cordless drill.
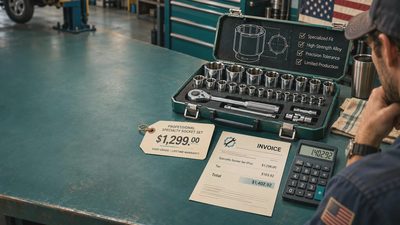
Do not buy a large tool because an online tour made it look essential. Rent a floor grinder, miter saw, or compressor when you need it twice a year. Buy the tools that solve repeated problems in your garage. A dependable $30 clamp that you use every week is more valuable than a $300 specialty gadget that sits in its packaging.
Before spending, mark the floor with painter's tape and live with the proposed layout for a week. Park the vehicle, open doors, carry a sheet of plywood, and walk the path with a full storage bin. Those ten-minute tests expose bad clearances faster than a computer drawing. Build the room around work, leave room to change, and let the workshop essentials earn their place.
Back to the bench.