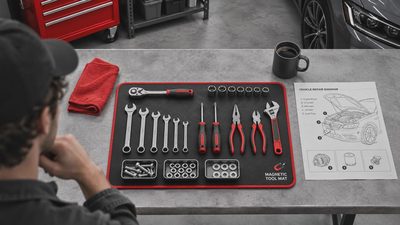
The first of these torque tips is simple: a fastener is not tight because it feels tight. I learned that after replacing a wheel bearing on my old Chevy pickup and discovering I had crushed the bearing preload by leaning too hard on a long breaker bar. A torque wrench is not fancy shop decoration. It is how you apply the clamping force the engineer intended, whether you are working on a car, mounting a workbench, or assembling a garage storage system.
Torque tips start with the right specification
Find the specification before you put a wrench on the fastener. For a vehicle, the service manual is the best source, followed by a manufacturer repair guide or a reputable parts manual. Do not assume every bolt of the same diameter gets the same setting. A dry grade 8 bolt, a lubricated suspension bolt, and a wheel lug nut can require very different treatment.
For household projects, the instructions matter just as much. A lag screw holding a wall-mounted cabinet may need a snug installation rather than a high torque setting, especially if it enters a stud or soft wood. Overtightening can crush plywood, pull threads from a metal insert, or distort a bracket. Write the value down on a scrap of tape if you are moving between several assemblies. That prevents the common mistake of leaving a wrench set at 90 foot-pounds after tightening wheel lugs and then using it on a small engine cover.
Torque specifications usually appear as pound-feet, pound-inches, or Newton-meters. One foot-pound equals 12 inch-pounds, so 60 inch-pounds is only 5 foot-pounds. That conversion matters when you are working on bicycles, lawn equipment, electrical enclosures, or small fasteners. A setting that is ten times too high can turn a repair into a broken part.

Choose the wrench for the work
One of the most useful torque tips is to stop expecting one wrench to do everything. A click-style wrench covering 20 to 100 foot-pounds handles many automotive jobs, including common wheel lug settings. A smaller inch-pound wrench is more suitable for valve covers, carburetor parts, motorcycle controls, and small hardware. A large 50 to 250 foot-pound wrench belongs on axle nuts, heavy suspension components, and similar work where the specification actually calls for it.
I keep a 3/8-inch drive click wrench from Tekton in my general toolbox because it has survived years of garage use and reads clearly. My larger CDI wrench gets used for higher settings. I am not recommending a tool I bought last Tuesday; both have been in my shop for more than six months and have seen real winter temperature swings. You do not need the most expensive Snap-on or Matco tool to work accurately, but you do need a wrench with a readable scale, a sensible range, and a calibration history.
Avoid using a torque wrench as a breaker bar. The internal mechanism is designed to measure and release at a selected setting, not to loosen rusted hardware. Use a regular ratchet or breaker bar to break the fastener loose, then switch tools for final tightening.
Torque tips for clean threads and steady readings
Thread condition changes the result. Dirt, rust, paint, thread locker, and lubricant all affect how much of your applied torque becomes actual clamping force. Before installation, clean reusable bolts with a wire brush and inspect the threads under good lighting. Replace hardware with stretched threads, rounded heads, deep corrosion, or damaged shoulders.
Do not automatically add oil because a bolt feels rough. If the specification says dry, install it dry. If the manufacturer calls for a lubricant or thread locker, use that product and follow its instructions. Blue medium-strength thread locker is common for removable automotive hardware, while high-strength red formulas can require heat and extra effort during disassembly. Neither product is a substitute for the correct torque setting.
Start every fastener by hand for several turns. If it binds immediately, back it out and find the problem instead of forcing it with a ratchet. Cross-threading can happen faster than most people expect, particularly with aluminum engine parts and wheel studs. These basic torque tips save more time than any premium tool because they prevent damage before the wrench ever clicks.
Use the correct tightening sequence
When a part has several fasteners, sequence matters. A flange, brake component, cylinder head, wheel, or workbench frame can warp if you tighten one side fully while the opposite side is loose. Use a crisscross pattern on four- and five-lug wheels. For a rectangular flange, work from the center outward when the service instructions specify that approach. On a long cover, alternate between opposite sides so the gasket settles evenly.
Many automotive assemblies call for multiple stages, such as 30 foot-pounds followed by 50 foot-pounds and then an additional angle turn. Do not skip the stages because the final number looks more important. The staged process gradually seats the component and distributes pressure. If the instructions call for torque plus angle, use an angle gauge or a marked reference point rather than guessing with your wrist.
Pause after the first pass and inspect the assembly. A gasket that bulges, a bracket that shifts, or a bolt that bottoms out before the part is clamped deserves attention. These torque tips apply to garage construction too: tighten wall hardware evenly, keep brackets square, and do not pull a crooked frame into position with a fastener.

Torque tips for using a click wrench correctly
Set a click wrench while looking straight at the scale. Lock the handle if the design includes a lock, and keep your hand on the marked grip rather than the head. Pull smoothly at a right angle to the wrench. Jerking, pushing at an angle, or gripping the extension changes the leverage and can produce a misleading result.
When the wrench clicks, stop. Do not add another quarter turn because the fastener looks under-tightened. If you miss the click, reset the wrench and make another controlled pass. Never use a pipe over the handle to increase force. That can damage the mechanism and turn a modest setting into a dangerous one.
Most click wrenches should be returned to their lowest marked setting after use, not forced below the minimum. Store the tool clean, dry, and protected from drops. Calibration intervals depend on use, storage, and manufacturer guidance, but a wrench that has been dropped or used as a breaker bar deserves inspection immediately. A calibration service often costs less than replacing a damaged wheel hub or engine component.
A practical garage checklist before you tighten
Before starting, write down the specification and confirm its units. Gather the correct socket, extension, adapter, cleaning brush, and any required lubricant or thread locker. Check that the socket fully engages the fastener. Set the wrench, tighten in the stated sequence, and record whether the procedure requires a second pass or angle turn.
Afterward, mark completed fasteners with a paint pen when that is appropriate for the job. A small line across the bolt head and adjacent surface gives you a quick visual check during future inspections. Do not treat a paint mark as proof of torque, but use it to spot movement.
The best torque tips are the ones that leave the garage quiet and the repair uneventful: clean threads, correct units, the right tool, a steady pull, and no guessing. I have screwed this up so you do not have to. Set the wrench, follow the manual, and let the tool do its job. Back to the bench.