A good pegboard can turn the wall beside your workbench into the most useful square footage in the garage. I have installed plenty of them over the years, and I have also pulled down a few that failed because somebody skipped the blocking, overloaded the hooks, or mounted everything too high. If you are planning a pegboard wall, the goal is not to make the garage look tidy for one Saturday afternoon. The goal is to make tools easy to see, easy to reach, and easy to put away after a project.
Start with the wall, not the accessories
Before buying panels, measure the wall from the garage floor to the lowest obstruction. Account for the garage door tracks, opener, electrical outlets, windows, shelves, and the hood of a parked vehicle. A four-by-eight-foot sheet is common, but two two-by-four-foot panels can be easier to handle and replace.
I usually leave the bottom edge about 36 inches above the floor if the wall is near a bench. That keeps long-handled tools visible without putting them where a broom or car door will hit them. Above a bench, 18 to 24 inches of clear wall is useful for small items and hand tools. Mark the height with painter's tape before drilling anything. Standing in the empty space with a tape measure will reveal awkward reaches that a sketch misses.
A standard hardboard pegboard is inexpensive, often costing roughly $15 to $35 for a four-by-eight-foot sheet. It works well for screwdrivers, pliers, clamps, and light garden tools. Tempered hardboard is denser and holds up better in a garage that sees humidity and temperature swings. Metal panels cost more, commonly $50 to $150 depending on size, but they resist moisture and handle repeated hook changes without crumbling around the holes.

Mounting pegboard so it stays put
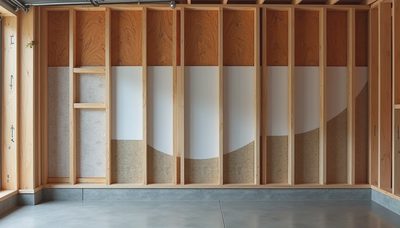
Pegboard needs an air gap behind it. The hooks need room to pass through and lock, so do not screw a sheet directly against drywall or studs. Install horizontal furring strips, usually one-by-two or one-by-three lumber, behind the panel. Fasten those strips to studs with structural screws, then attach the panel to the strips with washers and screws.
For a typical garage wall, I place backing strips at the top, bottom, and every 16 to 24 inches across the panel. If the sheet will carry heavier items, use more backing rather than hoping larger screws will solve the problem. A washer prevents the screw head from pulling through the hardboard. Leave enough clearance around outlets so the cover plate remains accessible.
Here is a mistake I made on my own garage: I used drywall anchors on a section that looked lightly loaded. Six months later, a row of sockets, two drills, and a small vise pulled the panel loose. I rebuilt that section with solid blocking tied into the studs. I have screwed this up so you do not have to.
Plan tool locations by frequency
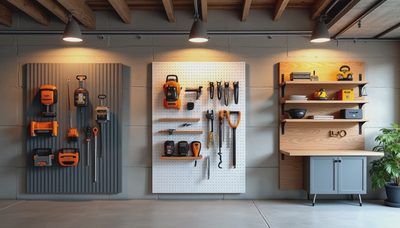
Put the tools you use every week between waist and shoulder height. Tape measure, utility knife, adjustable wrench, square, pliers, and screwdrivers should be visible without stretching. Put seasonal items, spare blades, and specialty tools higher or on a separate shelf. Heavy items belong low, close to the wall, where their weight does not twist the panel.
Lay the tools on the floor before hanging them. Group electrical tools together, woodworking tools together, and automotive tools together. Leave a little empty space between groups. A pegboard that is packed edge to edge looks efficient until you need to remove one tool and three others fall down.
I like to outline frequently used tools with a paint marker or a small label. The outline is not decoration; it tells you where the tool belongs when cleanup starts. On a busy evening, that simple visual cue can save ten minutes of hunting for a missing driver.
Hooks, brackets, and realistic load limits
Most single hooks are made for light hand tools, but the exact capacity depends on the panel, fasteners, hook design, and installation. Treat a hardboard panel as light-duty storage unless it is properly backed and the load is spread across several hooks. A cordless drill, impact driver, and battery can easily weigh several pounds together, so use a dedicated bracket or small shelf rather than one narrow hook.
Brand-name systems from Gladiator, Wall Control, and Rubbermaid offer useful brackets, bins, and tool holders. Generic hooks are cheaper and often fine for screwdrivers or scissors, but their bent wire can be inconsistent. Buy a small assortment first and test the fit before purchasing a large kit. Some systems use proprietary slots rather than traditional round holes, so accessories are not always interchangeable.
For long-handled tools, use two-point support. One hook near the handle and another near the shaft keeps a shovel, level, or pry bar from swinging into the vehicle. Never hang a heavy tool where it can drop onto a hood, windshield, or walking path.

Make the setup survive a real garage
Garages are dusty, damp, and rough on materials. Seal cut edges of hardboard with primer or paint before mounting. I have used a quality water-based porch and floor enamel on panels with good results, provided the surface is clean and dry. Painting both sides is unnecessary for most installations, but sealing the exposed edges is worthwhile.
Do not place pegboard directly above a grinding station or where it will collect oily mist. Metal panels are better near automotive work, while painted hardboard is perfectly serviceable in a clean woodworking area. Keep a few inches of clearance from a concrete floor that gets wet during storms or snowmelt.
Lighting matters more than people expect. A bright LED shop light aimed at the wall prevents tools from disappearing into shadows. If the panel sits beside a bench, install lighting before the storage so the cord, switch, and fixture do not interfere with the layout. A $40 to $100 light can improve the workspace more than another box of accessories.
A practical installation sequence
First, clear the wall and confirm the parked vehicle will not hit the planned storage. Next, locate studs with a finder and verify them with a small pilot hole. Mark the backing-strip locations, install the strips, and check them with a level. Cut the panel outside if possible; hardboard dust gets everywhere.
After fastening the panel, install only the basic hooks. Hang the tools you use most, then live with the arrangement for a week. Move anything that requires an awkward reach. Add bins and specialty brackets only after the daily pattern becomes obvious. This slower approach prevents the common mistake of spending $100 on accessories that solve the wrong problem.
A basic four-by-eight-foot setup can cost $75 to $200, including panel, lumber, screws, paint, and a starter assortment of hooks. A premium metal system across an entire wall can run $300 to $800, especially when shelves and cabinets are added. The cheaper installation is not automatically worse; solid framing and sensible weight distribution matter more than a flashy finish.
The setup I would build today
For a typical attached garage workshop, I would use a painted hardboard pegboard above a sturdy bench, backed with one-by-three lumber at 16-inch intervals. I would reserve the center area for daily hand tools, put batteries and chargers on a ventilated shelf, and keep heavy clamps on a low cabinet. A narrow strip of pegboard beside the door would hold keys, gloves, safety glasses, and the broom.
That arrangement leaves the wall useful without turning it into a crowded display. It also makes future changes simple. When the bench moves or a new tool joins the shop, you can relocate a hook instead of rebuilding the whole storage system. Take a photograph once the layout works; it gives everyone in the household a clear cleanup target.
A pegboard is not a complete garage organization plan, but it is an excellent first layer when it is mounted correctly and loaded honestly. Build the backing, protect the material, keep heavy tools low, and let real use determine the final layout. Back to the bench.