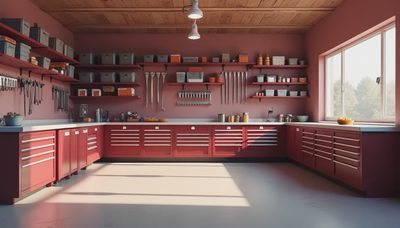
The right garage cabinets can make an attached garage feel like a working shop instead of a holding pen for holiday decorations, paint cans, and loose tools. I have organized more than 40 garages over the years, and I have learned that storage usually fails for one reason: homeowners buy boxes before deciding how the room will actually be used. Garage cabinets should support the workbench, parking area, lawn equipment, and electrical layout rather than simply fill an empty wall.
I learned that lesson in my own Ohio garage. I installed inexpensive particleboard units along one wall, loaded them with sockets and hardware, and discovered that the doors swelled after one wet winter. Six months later, I tore them out. I've screwed this up so you don't have to.
Start With the Garage You Actually Have
Before shopping, measure the wall from floor to ceiling, then mark the garage door tracks, service door, windows, furnace, water heater, and electrical panel. Leave at least 30 inches of clear walking space where people regularly pass, and remember that a vehicle door needs room to open. A tall cabinet that looks reasonable on paper can make a two-car garage feel narrow once a truck is parked inside.
Most homeowners do well with a combination of 24-inch-deep base units, 12- to 16-inch-deep wall cabinets, and one tall locker for brooms, pressure-washer hoses, or folding chairs. Base cabinets usually stand about 34 to 36 inches high, which works well beside a 36-inch workbench. If you plan to roll a toolbox underneath, measure the casters and handle first. I have seen a $700 cabinet layout ruined because a tool chest missed the opening by two inches.
Think in zones. Put automotive supplies near the driveway side, fasteners and hand tools near the bench, and seasonal items in the least convenient upper storage. That small decision saves a surprising amount of walking.

Choose Materials That Can Take Garage Abuse
Steel garage cabinets are my first choice for a serious workshop. Brands such as NewAge Products, Gladiator, and Husky offer steel systems with adjustable shelves, locking doors, and finishes that tolerate oil, dirt, and temperature swings better than household furniture. A complete steel setup can cost roughly $1,000 to $4,000, depending on width, drawer count, and whether installation is included.
Powder-coated steel is preferable to thin painted sheet metal. The coating resists scratches, although it is not magic; dragging a cast-iron vise across a shelf can still damage it. Look for welded corners, reinforced shelves, full-extension drawer slides, and a stated shelf capacity. A shelf rated for 100 pounds is a different proposition from one rated for 35 pounds.
Heavy-duty plastic cabinets are useful for damp garages, muddy gardening gear, and homeowners who want a lighter installation. They generally cost less, often around $150 to $500 per unit, but shelves can sag under dense tools. Wood-based cabinets are attractive and easy to customize, but ordinary melamine or MDF needs protection from water and floor moisture. If you use wood, seal exposed edges and keep the cabinet base off the slab.
Base Cabinets, Tall Lockers, or Wall Storage?
Base garage cabinets give you a useful work surface and are the easiest option to combine with a butcher-block top. They are also the easiest to overload. Put cordless tools, fasteners, and frequently used automotive supplies in drawers, but reserve deep shelves for lighter bins. A drawer full of sockets becomes extremely heavy very quickly.
Tall lockers use vertical space efficiently. One 30-inch-wide locker can swallow a shop vacuum, extension cords, winter boots, and a leaf blower without spreading clutter across the floor. Include ventilation if you store fuel-related equipment, and never keep gasoline inside a cabinet attached to living areas. Follow local fire and storage rules for flammable liquids.
Wall-mounted garage cabinets keep the floor clear and make sweeping easier. They are excellent above a workbench, but the fasteners matter. Do not trust drywall anchors for a loaded steel cabinet. Locate studs, use structural screws or the manufacturer’s rail system, and confirm that the wall can carry the combined cabinet and contents. When in doubt, add blocking before the cabinets arrive.
A mixed layout normally beats an entire wall of identical units. In my shop, the most useful section is a 72-inch base run with drawers, a solid top, and two wall cabinets above it. The tall locker sits at the end, where it does not interfere with the car.

Installation Details That Prevent Expensive Mistakes
Start with the finished floor height, not the bare concrete. If you install an epoxy coating, interlocking tiles, or a raised platform later, the cabinet doors and adjustable feet may need to be reset. I like to put steel cabinets on leveling feet or a sealed plywood plinth rather than directly on a damp slab. That protects the bottom edge and makes a crooked floor manageable.
Use a long level across several units before tightening every fastener. Cabinets that are individually level can still look uneven when joined together. Clamp adjacent boxes, connect them through the approved holes, and install anti-tip hardware. A loaded tall cabinet can become dangerous if someone opens a drawer while a child climbs or a heavy item shifts inside.
Plan electrical access before the back panels go on. A receptacle hidden behind a cabinet is not useful, and cutting a clean opening after installation is harder than making the layout work from the beginning. Keep required access to the electrical panel, shutoff valves, and furnace clear. Add LED task lighting under wall cabinets if the bench will be used for wiring, sharpening, or small engine work.
What a Practical Budget Looks Like
A modest setup with two base units, one wall cabinet, and a laminate top may land around $800 to $1,500. A more complete steel system with drawers, lockers, a worktop, and delivery commonly reaches $2,000 to $5,000. Custom built-ins can go higher, especially after accounting for framing, trim, painting, and electrical work.
Do not compare only the sticker price. Add delivery, assembly, wall reinforcement, leveling, and the cost of drawer organizers. A $1,200 cabinet system that arrives assembled may be a better buy than $850 worth of flat-pack units that consume your weekend and require a trailer rental. Measure the packaging too; garage cabinets that fit the finished wall may not fit through the side door in their shipping cartons.
If funds are tight, buy the bench and the cabinet that holds your most-used tools first. You can add a matching locker later. A clean, well-planned first section is more useful than a cheap wall of storage that blocks the garage before the layout is proven.
My Final Garage Cabinet Checklist
Before ordering garage cabinets, write down the wall dimensions, ceiling height, door-track location, and the largest vehicle you park inside. Mark a 30-inch walking path with painter’s tape. Count the tools that need drawers, shelves, or a tall compartment. Check every cabinet’s depth against vehicle mirrors and door swing. Confirm shelf ratings, drawer capacity, mounting hardware, delivery dimensions, and return terms.
Then decide where the work happens. The bench should receive the best light, the most convenient outlets, and the storage for tools used every week. Seasonal items can go higher or farther from the main work zone. Leave one small area unfinished for future changes; every workshop evolves after you live with it through a full winter and summer.
Good garage cabinets do more than hide clutter. They protect tools, shorten setup time, improve safety, and make the room useful for repairs, projects, or simply parking the car without moving six boxes first. Build the storage around your habits, fasten it properly, and spend the money on construction that will survive real garage life. Back to the bench.