An outdoor car lift is one of those ideas that looks simple until you start measuring concrete, wind, vehicle height, and the path of rainwater. I understand the appeal. A suburban garage fills up quickly with shelves, a workbench, lawn equipment, and one project car that has been sitting on jack stands since spring. Adding an outdoor car lift can create a second service bay without building another garage, but only if the installation is treated like a small construction project instead of a big piece of equipment dropped on the driveway.
I have helped homeowners make room for lifts, and I have also removed poorly planned setups. The common failures are predictable: a thin driveway slab, no overhead clearance, exposed hydraulics, and no plan for securing the vehicle during a storm. I've screwed this up so you don't have to. Here is how I would approach the decision today.
Choose the lift around the work you actually do
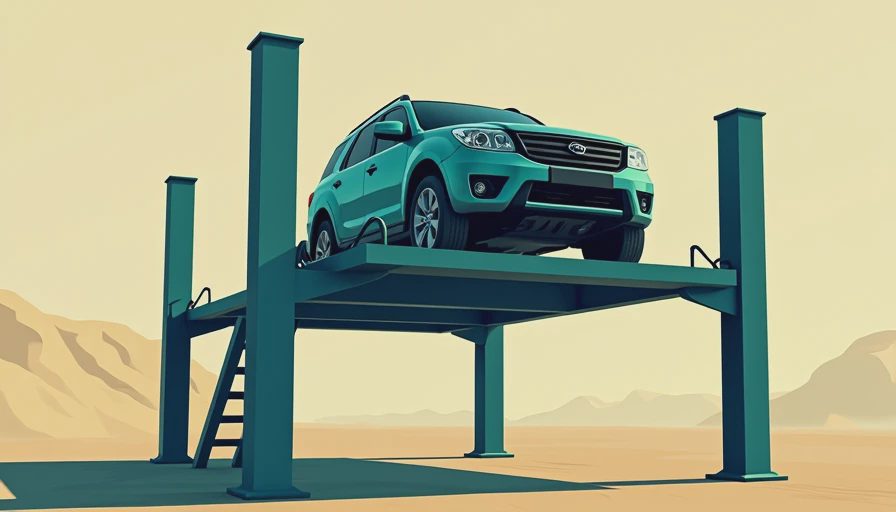
A four-post lift is usually the friendliest outdoor car lift for a homeowner. It supports the tires on long runways, is relatively straightforward to drive onto, and can store a second vehicle underneath. A quality four-post model from companies such as BendPak or Challenger often costs roughly $3,000 to $6,000 before delivery and installation. Add ramps, drip trays, a rolling jack, and weather protection, and the practical budget can reach $5,000 to $8,000.
A two-post lift gives better access to wheels, brakes, suspension, and exhaust components. It also takes less floor space, but it transfers significant force into the slab and requires careful arm positioning. For an outdoor car lift used for serious repair work, I prefer a properly engineered two-post unit only when the concrete and anchoring plan are beyond question. A budget two-post lift is not a bargain if it cracks the slab or leaves a vehicle unstable.
Scissor lifts and portable systems such as QuickJack are useful when you need moderate elevation rather than long-term vehicle storage. They are easier to move and can cost less, but they do not provide the same under-car standing room or storage capacity. Start with your normal jobs. Oil changes and brake work point one way; storing a classic car above a daily driver points another.

The slab matters more than the shiny steel
Most residential driveways are not automatically ready for an outdoor car lift. A typical driveway can be four inches of concrete, while lift manufacturers often specify thicker, stronger concrete with minimum strength requirements and clear anchor zones. The exact requirement depends on the model, loaded vehicle weight, post layout, and whether the lift is two-post or four-post.
Before ordering, locate control joints, drain lines, utility conduits, and the edge of the driveway. A post placed near a joint or slab edge is a structural problem, not a cosmetic inconvenience. In many cases, the right solution is a dedicated pad or widened section poured by a concrete contractor. Budget approximately $1,500 to $4,000 for a modest reinforced pad, with excavation, access, reinforcement, and local labor moving that number higher.
Do not guess at concrete thickness by drilling one hole and hoping for the best. Get the lift installation instructions first, then have a qualified contractor evaluate the slab. If the existing driveway slopes noticeably, plan on correcting the surface or choosing equipment designed for the condition. A level base makes loading easier and keeps the lift operating as intended.
Weather protection is part of the installation
An outdoor car lift lives in a much harsher environment than one inside a dry garage. Sun damages rubber components, road salt attacks exposed hardware, and freezing water finds its way into every seam. A cover helps, but a loose tarp flapping against a vehicle and steel posts can cause its own damage.
For an outdoor car lift, I would build a roofed shelter with open sides or removable panels, depending on local weather. A simple structure with a metal roof, gutters, and enough clearance for the raised vehicle is more useful than a decorative carport. Keep water from draining across the base plates. Gravel around the pad can improve drainage, but it should not replace a solid, level working surface.
Use manufacturer-approved lubricant and inspect cables, locks, hoses, fittings, and anchor hardware on a schedule. Do not wrap hydraulic components in airtight plastic and trap condensation inside. A breathable equipment cover, sheltered controls, and a small lockable cabinet for accessories usually work better. In Ohio, I would inspect after every freeze-thaw season and after any major windstorm.
Measure the vehicle and the sky before you buy
The advertised lifting height is not the same as usable working height. Measure the tallest vehicle, add the lift platform or tire height, and leave room to walk around it. A truck with a roof rack may need substantially more clearance than a low coupe. Also measure the full footprint, including ramps, safety locks, approach space, and room to open doors.
A four-post outdoor car lift can need 12 to 14 feet of clear length once ramps and working space are included. If the lift sits near a property line, fence, sidewalk, or garage door, check local setback and zoning rules before concrete is poured. Some municipalities treat a permanent shelter as a structure, and electrical work may require a permit.
Think about delivery too. A lift package can arrive on a freight truck with long, heavy components. Confirm that the truck can reach the installation area and that you have several strong helpers or professional unloading equipment. Saving $500 on installation is not worth dropping a column onto a driveway or bending a runway.
Safety habits that keep the project useful
Never rely on hydraulic pressure alone to hold a vehicle overhead. Raise the platform to the intended height, engage the mechanical locks, and confirm that both sides are locked before working underneath. Keep the load centered, follow the lift's rated capacity, and account for toolboxes, spare parts, and passengers. A 9,000-pound rating does not make every loading position safe.
Keep children, pets, and visitors away from the operating area. Mark the control side, store the keys, and maintain a clear path around the posts. A wheel chock, drip pan, and bright inspection light are inexpensive additions that prevent ordinary mistakes. If the lift makes an unfamiliar sound, stops unevenly, or shows hydraulic leakage, lower it safely and stop using it until the cause is identified.
For an outdoor car lift, wind deserves special attention when the vehicle is raised. Do not leave a car elevated during severe weather unless the equipment manufacturer specifically permits that use and the installation is designed for it. Lower the platform, secure the vehicle, and keep the shelter from becoming a sail.
A realistic budget and buying checklist
A basic four-post unit may start near $3,000, while a stronger professional model can exceed $7,000. Freight, assembly, concrete, electrical work, drainage, a shelter, and accessories can add another $2,000 to $8,000. That makes a complete outdoor car lift project commonly land between $6,000 and $15,000, depending on how much site work is required.
Before placing an order, verify the following:
- The lift capacity matches the heaviest vehicle and equipment you will load.
- The slab meets the written thickness, strength, and anchoring requirements.
- The approach is level, wide, and clear of overhead obstructions.
- Replacement parts, service information, and support are available.
- The shelter protects the controls, hydraulics, and base from weather.
- Your homeowners insurance provider knows about the permanent equipment and any new structure.
That last conversation is practical, not bureaucratic. An outdoor car lift and a roofed shelter can change the risk profile of the property. Keep receipts, installation records, model numbers, and inspection notes in one folder.
My recommendation from the bench
If your main goal is vehicle storage, a four-post outdoor car lift under a properly built roof is the sensible route. If you need frequent suspension and brake access, a professionally installed two-post system may be better, but it deserves more engineering and more disciplined maintenance. Portable lifts are a good compromise for occasional work when storage is not the priority.
I would spend money first on the pad, drainage, shelter, and installation, then choose the lift. Steel is easy to admire in a catalog; the site preparation is what keeps it safe after five winters. Plan the project around the vehicle, the weather, and the concrete, and the extra bay can earn its space every week. Back to the bench.