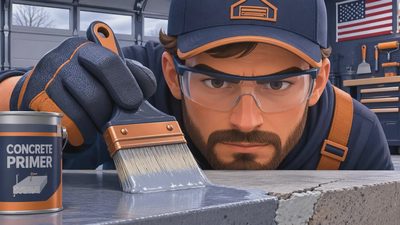
Repainting epoxy floor surfaces is not as simple as rolling another coat over the old one. I learned that the expensive way in my own garage. I painted a floor, moved heavy shelving onto it too soon, and watched tire pickup and peeling spread across the entrance within six months. The coating looked fine from the doorway, but the preparation underneath was weak.
If your garage floor is dull, scratched, stained, or losing color, a new coating can still be worthwhile. The key is figuring out whether the existing epoxy is sound, cleaning it aggressively, dulling the surface, and using a compatible product. I've screwed this up so you don't have to.
Decide Whether the Old Coating Can Be Saved
Start with a close inspection, not a color chart. Look for loose flakes, bubbles, soft areas, cracks, and sections that lift when you scrape them with a putty knife. A few chips near the garage door do not automatically mean the whole floor needs removal. Widespread peeling does.
A simple tape test gives you useful information. Cut a small X through the coating with a utility knife, press down a piece of duct tape, then pull it up sharply. If large pieces come away outside the cut, the bond is failing. Repainting epoxy floor over that surface only hides the problem temporarily and makes the eventual removal harder.
Also check for moisture. Tape a 2-by-2-foot sheet of clear plastic to the slab for 24 hours. Condensation or a darkened concrete area underneath points to moisture moving through the slab. Epoxy does not tolerate that situation well. Solve the moisture issue before spending $300 to $800 on a new garage coating.

Preparation Does Most of the Work
Move everything out, including the refrigerator, compressor, and wall-mounted items that might drip. Sweep first, then vacuum the dust. Oil spots need a real concrete degreaser and stiff nylon brush. Dawn dish soap is useful for light grime, but it is not my choice for years of transmission fluid.
For repainting epoxy floor projects, mechanical abrasion is better than simply washing. Rent a floor buffer with a sanding screen, or use an angle grinder with a diamond cup wheel on stubborn areas. You are not trying to remove every inch of epoxy. You are creating a uniformly dull surface with no glossy patches. Wear eye protection, hearing protection, and a proper dust mask or respirator suited to the product and dust involved.
After sanding, vacuum slowly and wipe the floor with a clean, damp microfiber mop. Let it dry completely. Run your hand across the slab; if it feels chalky or leaves powder on your palm, clean it again. Dust trapped under a new coating becomes a weak layer.
Repair Chips, Cracks, and Edges
Small chips should be feathered with a grinder or coarse sanding disc so the repair does not leave a sharp ridge. Fill them with a manufacturer-approved epoxy patch or a two-part concrete repair compound. Do not use ordinary drywall joint compound or a cheap premixed filler; both are poor choices for a vehicle floor.
Hairline cracks deserve attention, but do not expect a coating to stop a moving structural crack. Open the crack slightly, remove loose material, vacuum it, and fill it according to the repair product instructions. If the slab has heaved, dropped, or cracked from one wall to another, bring in a concrete professional before coating.
The garage-door threshold needs special care. Water, salt, and hot tires attack this area first. Grind loose coating back to a solid edge, clean the concrete, and make sure the replacement product is rated for floor use. When repainting epoxy floor areas near the door, leave no curled lip for a tire to catch.
Choose the Right Recoat Product
Not every floor paint bonds to cured epoxy. A water-based porch coating is not a substitute for a two-part epoxy or a compatible polyaspartic system. Read the technical data sheet for recoat windows, surface profile, temperature limits, and primer requirements. If the sheet says to abrade the old coating, do not skip that step.
For a typical two-car garage of 400 to 500 square feet, a serious recoat can run roughly $250 to $600 in materials. That includes cleaner, abrasives, repair filler, primer if required, coating, and rollers. Professional preparation and application often lands around $1,500 to $4,000, depending on removal, repairs, moisture problems, and the finish system.
A solid-color epoxy is usually more forgiving visually than a heavy decorative flake broadcast. Flakes hide dust and small repairs, but they also require enough wet film thickness and a clear topcoat. If the old floor has uneven color but strong adhesion, repainting epoxy floor with a darker compatible shade can make the garage look new without pretending the slab is perfect.
Application and Cure Time Matter
Plan the work around the weather and your schedule. Most coatings need a concrete and air temperature inside a specified range, often roughly 60 to 90 degrees Fahrenheit. Cold conditions slow curing, while a damp evening can leave a coating cloudy or tacky. In an attached garage, keep the door open for ventilation when safe, and protect the work area from leaves, insects, and sudden rain.
Mix only the amount you can use during the product's pot life. Once a two-part coating is combined, it does not remain usable all day. Pouring the mixture into a shallow roller tray can slow heat buildup, but follow the manufacturer's instructions rather than relying on a shop trick.
Use a quality 3/8-inch nap solvent-resistant roller and keep a wet edge. Do not stretch the coating until the roller is nearly dry. Thin areas wear first under tires. If using flakes, broadcast them while the base coat is wet, then remove loose pieces after curing before applying the clear coat.
Repainting epoxy floor surfaces does not mean parking on them the next morning. Foot traffic may be allowed after 12 to 24 hours, but vehicle traffic commonly requires several days. Heavy tools, jacks, and shelving should wait longer. The label wins over the calendar.
Make the Recoat Last Longer
Hot tires are a frequent cause of failure, especially when the original floor was poorly bonded. Let the coating cure fully before parking, and avoid turning the steering wheel while the car is stationary. Use rubber-backed pads under jack stands and casters, but make sure the pad material is compatible and does not trap moisture.
Clean road salt and oil promptly with a mild detergent and soft brush. Avoid dragging steel cabinets across the floor. If you need to move a tool chest, place plywood down and roll it slowly. I use a small plywood track whenever I rearrange my workbench because one careless shove can gouge a fresh finish.
Repainting epoxy floor work is also a good time to fix the garage habits that damaged it. Add a drip tray under the lawn mower, store solvents in a cabinet, and keep a mat at the entrance during winter. A coating is tough, not indestructible.
When Removal Is the Better Answer
If the old epoxy is peeling in sheets, feels rubbery, or has widespread bubbles, stop planning a cosmetic recoat. Grinding or shot blasting back to sound concrete is usually the honest solution. It costs more up front, but applying another layer over failure can turn a manageable project into a full tear-out.
For a small garage with a few isolated failures, spot repair and repainting epoxy floor sections may be reasonable. For a floor failing everywhere, hire a contractor with dust-controlled grinding equipment and ask how they will test moisture and surface profile. Request a written scope that separates preparation, repairs, coating, and topcoat costs.
A good garage floor is not about having the shiniest finish on the block. It is about a coating that bonds, cures, handles tires, and can be cleaned after a messy weekend project. Take the time to test the old surface, abrade it properly, and respect the cure schedule. Back to the bench.