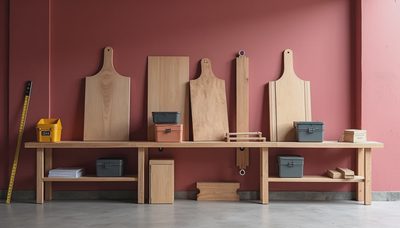
If you want a bench that feels honest instead of fancy, the Paul Sellers woodworking bench is still one of the best places to start. I like it because it is simple, heavy, and built to work in a real shop, not pose for a photo. In a garage, that matters. You need something that can hold a door slab, survive hand-planing, and not skate across the floor the first time you lean into a board. I’ve screwed this up so you don’t have to, and I can tell you this: the bench you actually use beats the bench you keep “meaning to finish.”
Why the old-school layout still wins
The reason this bench sticks around is the same reason good framing still looks boring: it works. The top is thick, the base is stout, and the whole thing is easy to understand. There is no mystery joinery to slow you down, and no delicate trim to baby later. If you are flattening a board by hand, sharpening at the front corner, or chopping a mortise, you want mass and a clear edge to clamp against.
I also like the fact that it rewards accuracy without demanding perfection. A garage floor is rarely dead level. A bench like this can be shimmed, leveled, and put back to work without drama. That is worth more than a prettier design that fights you every time you move it. If you have only a half day to work, this kind of bench lets you spend your time building, not fussing.
For a lot of homeowners, the sweet spot is a top around 60 to 72 inches long, 24 to 30 inches deep, and roughly 34 to 36 inches high. That gives you enough surface to assemble a cabinet door or plane a board, but it still fits in a single-bay garage without turning the place into an obstacle course.
What I would change for a garage build
The version I would build today is a little less precious than the one in the books and a little more useful in a garage. First, I would choose lumber I can actually get locally without waiting two weeks. Clear maple is nice, but good construction lumber glued up well can make a bench that earns its keep. If you want a premium top, beech is hard to beat. If you want to get moving, SPF or Douglas fir can still do the job if you laminate it tight and flatten it once the glue cures.
Second, I would plan storage from the start. A lower shelf holds planes, glue, layout squares, and the box of clamps that always ends up on the floor. That shelf also adds weight, which helps when you are planing or chiseling. If your garage doubles as parking, leave enough space to walk around the bench with a board in your hands. A bench that is perfect on paper but blocks the mower is not a win.
As for cost, a bare-bones version built from dimensional lumber and a used vise can land around $200 to $350. Step up to hardwood, a new vise, and better hardware, and $600 to $900 is easy. That is still cheaper than most “workbench” systems at the home center, and it is far sturdier than most of them.

Lumber, hardware, and finish choices that make sense
The Paul Sellers woodworking bench does not need exotic parts. A handful of 2x4s, a few straighter 2x6s, a sheet or two of plywood for the lower shelf if you want it, glue, and decent screws will get you there. I like Titebond III for laminations because it gives you a little more working time than the cheap stuff. For clamps, Bessey and Irwin still show up in my shop because they keep pressure where it belongs.
On the vise front, you do not need to chase a boutique setup. A solid cast-iron face vise from Yost, Wilton, or a good used vise from a flea market will do fine if it mounts square. If you want a tail vise later, add it later. That is the beauty of this bench: you can start plain and improve it after you have lived with it for a season.
I would skip a thick glossy finish on the top. A workbench top is not a dining table. Too much film finish makes glue drips and stray finish harder to clean up, and it can feel slick under a board. A wiped coat of boiled linseed oil or just a bare, waxed surface is enough for me. The bench should be easy to maintain, not precious.
Build order that saves you from redoing work
Start with the base and get it square before you touch the top. A bench that rocks is annoying on day one and maddening by day thirty. Dry-fit the stretchers, check diagonals, then glue and screw or glue and peg depending on how traditional you want to get. If you are working alone, use the floor as your clamp and your reference. That is not fancy, but it works.
When the top laminations go together, stagger the joints so you are not stacking every seam in one place. Clamp from the center out, then come back after the glue starts to set and check for twist. If you do not own a long straightedge, buy one or borrow one. A $40 straightedge is cheaper than fighting a hump in the middle of the bench for the next five years.
After the top is assembled, flatten it once. Do not keep promising yourself you will do it “later.” I have done that, and later turns into six months of working around a bad surface. Plane, scrape, or belt-sand just enough to make the top behave, then call it done and get to work.
How it feels once you actually use it
A good bench is not exciting in the first five minutes. It gets better over time. The first thing you notice is that boards stop wandering. The second is that your shoulder gets less tired because you are not fighting the bench itself. When I set up a bench like this in a garage, it usually ends up doing more than one job. It holds trim while I cut it, supports a cabinet carcass during assembly, and becomes the place where I sharpen chisels when the rest of the shop is a mess.
That is why I still like the Paul Sellers woodworking bench for homeowners who want one serious bench instead of three mediocre surfaces. It is heavy enough to stay put, simple enough to build in a weekend or two, and useful enough to earn garage space. If you have ever bought a flimsy bench and watched it wobble under a hand plane, you already know the difference.
The shortest path to a bench you will keep
If you want to move fast, keep the parts list short: straight lumber, wood glue, good clamps, a decent face vise, and a plan for the shelf below. Build the base first, then the top, then flatten it once. That sequence saves time and saves frustration. You do not need a perfect shop to build a good bench. You need a flat area, a few solid tools, and the patience to make the top heavier than your first instinct says it should be.
If you build the Paul Sellers woodworking bench this way, you will end up with a tool that feels like it belongs in a real garage shop, not a showroom. And once it is in place, you will wonder why you waited so long.
Back to the bench.