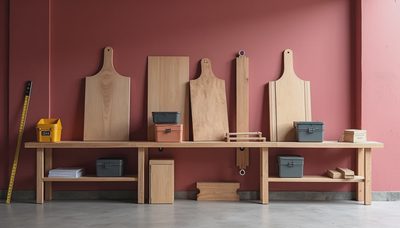
If you want a garage that earns its keep, start with storage and work bench layout before you buy one more plastic bin. I have seen too many garages where the owner spent money on cabinets first, then realized the bench blocked the fridge, the mower, or the path to the side door. A good shop starts with the boring stuff: where you stand, where you reach, and what needs to stay off the floor. That is the whole game with storage and work bench planning, and it is the part most people skip.
The best setups are not fancy. They are the ones that let you grab a drill, clamp a board, sweep the floor, and park a car without moving half the room. In my own garage, I rebuilt the bench three times before I got the flow right. That is why I tell homeowners to think in zones, not gadgets.
Start with the work zone, not the cabinets
A storage and work bench setup works best when the bench has a job and everything around it supports that job. If you use hand tools, small power tools, and glue-ups, a 24-inch deep bench is usually enough. If you build cabinets, assemble furniture, or repair engines, 30 inches feels better because it gives you room for clamps and parts trays. I like a bench height between 34 and 37 inches for general use, but if you are tall or you do a lot of hand planing, bump it up a little. The right height saves your back more than a fancy mat ever will.
Think about what happens on a normal Saturday. You are cutting a shelf board, charging batteries, sorting screws, and setting down coffee. That means the bench needs an open center, not a wall of drawers where your knees should go. I build most benches with a plywood top over a simple 2x4 frame, then add drawers or shelves only where they earn their keep. A clean, open bench beats a pretty one with no landing space.
If you are trying to keep costs sane, a solid DIY bench often lands in the $150 to $400 range for lumber, screws, and plywood, depending on size and finish. Add drawers and cabinet-grade ply, and it climbs fast. That is still cheaper than buying a flimsy premade unit that racks when you lean on it.
Put storage where your hand naturally goes
Upper wall storage should stay out of the way of the bench surface but close enough that you do not walk circles to find a tape measure. I like shallow wall cabinets, pegboard, or slatwall above the bench, with the heavy stuff below or beside it. A drill, charger, layout tools, and fasteners should live within arm’s reach. Seasonal items, extra oil, and backup supplies can go higher up.
This is where brands like Gladiator, NewAge, Husky, and Rubbermaid FastTrack tend to show up in real garages. The badge matters less than whether the system anchors into studs and fits your wall spacing. A 16-inch on-center wall is easy. A garage with odd framing, fire blocking, or concrete stem walls takes a little more planning. I have seen fine-looking cabinets fail because someone trusted drywall anchors for a 40-pound box full of wrench sets.
If you want a cleaner look, use closed cabinets for the ugly stuff and keep one open zone for the things you touch every day. Open shelves fill up fast and collect dust. Closed doors hide the mess, but they only work if you label the inside and stick to a rule. One shelf for adhesives, one for electrical, one for automotive fluids. That beats the old mystery pile every time.

Build for weight, heat, and garage abuse
Garages are hard on furniture. Summer heat, winter cold, wet snow off boots, and the occasional dropped socket all punish weak builds. If you are making your own bench, use quality screws, not nails, and keep the span tight enough that the top does not bounce when you lean on it. I like 3/4-inch plywood for the top and a finished edge so the front does not chew up your forearms. If you want a surface that wipes clean, laminate or a hardboard skin over the plywood works well.
For drawers, full-extension slides are worth the money because a half-open drawer is the same as a broken drawer when you are hunting for a 10 mm socket. On wall storage, anchor into studs with real lag screws or structural screws. If the wall is block or masonry, use the right anchors and do not guess. A storage and work bench area should handle paint cans, toolboxes, and a heavy vise without sagging. If it cannot, rebuild it before it becomes a repair story.
I learned this the hard way with a painted floor and a bench on cheap legs. The floor looked fine for six months, then chipped where I rolled the compressor. The bench wobbled every time I clamped something down. I tore both out and did them right. Sometimes the expensive part is doing it twice.
Lay out the bench so the garage still feels big
The biggest mistake I see is pushing the bench into the only open wall and calling it done. That usually kills the car door swing, blocks trash cans, or makes it impossible to get a mower to the back corner. A better layout leaves a clear path from the garage door to the side door and a separate lane for parking. Even in a two-car garage, you can usually carve out a 6- to 8-foot work zone if you respect the traffic flow.
A simple layout that works is one long bench on the back wall, wall storage above it, base cabinets below part of it, and tall storage tucked to one side. Keep the vise near an outlet and near good light. If you have a charging station, put it away from sawdust and away from the spot where wet boots drip. I also like a small landing shelf near the entry door for keys, gloves, and whatever comes out of the truck at 9 p.m.
This is the kind of planning that keeps the garage usable when life gets messy. You do not need a showroom. You need a place where the shovel, the battery charger, the shop vac, and the kid’s bike all have a home.
The setup I would build again tomorrow
If I were starting from scratch in a normal suburban garage, I would build one strong bench, add closed cabinets for the messy stuff, hang a few open tools on a wall rail, and leave open floor space on purpose. I would not fill every inch. A garage that is packed wall to wall feels busy for a week and irritating for years. The best storage and work bench plan is the one that gives you room to work now and room to change later.
A realistic midrange project can run from about $1,000 for a DIY bench and simple wall storage to $3,000 or more if you add cabinetry, slatwall, lighting, and better finishes. That is not pocket change, but it is money you feel every time you walk into the garage and do not have to move a pile first. If you want the shop to hold tools, holiday boxes, sports gear, and a real work surface, start with the bench and build outward.
I have screwed this up so you do not have to. Build the bench for the work you actually do, not the one you imagine doing someday, and the rest of the garage gets easier from there. Back to the bench.