A workbench with cabinets and drawers is one of the first things I add when a garage stops being a parking spot and starts acting like a shop. If you are cutting trim, rebuilding a carb, sorting fasteners, or just trying to keep a drill from disappearing under holiday bins, the bench has to do more than look clean. It needs a top that stays flat, storage that opens without a fight, and a footprint that leaves room for a mower, bikes, and the door track. I have built enough of these to know the wrong layout gets annoying fast, and that annoyance costs you time every Saturday.
The base that keeps the bench honest
A workbench with cabinets and drawers should start with the cabinet boxes, not the pretty top. If the base racks or flexes, every drawer starts sticking and every cut feels sloppy. I like 3/4-inch plywood for the carcass, glued and screwed, with a hardwood or plywood face frame if the bench will take abuse. For slides, full-extension ball-bearing hardware is worth the money. Cheap slides feel fine for the first month and then start sagging once you load them with sockets, cordless tools, and hardware bins.
For a real garage shop, I plan on roughly 100 pounds per drawer for the good slides and maybe 75 pounds if the drawer is shallow and you are not abusing it. That is enough for hand tools and parts, not enough for a box of cast iron or a stack of brake rotors. The point is to build the base like furniture that expects work, not like a kitchen island with pegboard dreams.
Size it to the way you work
Depth matters more than most people think. Twenty-four inches works for a tight wall run, but 30 inches feels better when you are clamping, laying out lumber, or setting a small vise. Height is personal, but I land most benches between 34 and 36 inches. Taller guys like a little more. If you do a lot of hand planing or assembly, even an inch or two changes how your back feels after an hour.
The length depends on the garage, not the fantasy. An eight-foot run is a sweet spot because it gives you enough room for a vise, a small tool charge station, and a stretch of open top without taking over the whole wall. Leave room to swing cabinet doors and still walk past with a sheet of plywood. I have watched people build a beautiful bench and then block the freezer, the water heater, or the side door. That is a bad trade.

Materials that survive garage life
For the top, I still like plywood with a replaceable hardboard skin when the bench is going to see glue, paint, and metal work. If you want a cleaner look, butcher block is hard to beat, and a 1-1/2-inch maple top feels solid under a vise. It is not cheap, though. A solid DIY build usually lands somewhere around $500 to $1,500 in materials for an eight-foot setup, depending on hardware and the top. If you buy a prefab system from Husky, Gladiator, or NewAge, you can spend less time cutting and more time bolting the thing together, but you will give up some fit and finish.
For cabinet boxes, melamine is easy to wipe down, while plywood handles bumps and moisture better. In an attached garage, moisture is the part people forget. Wet snow on boots, condensation in spring, and an open door during a storm will punish cheap materials. If your garage is insulated and conditioned, you have more options. If it is a cold box in the Midwest like mine, build like splash water is coming.
Drawer slides, doors, and storage that do not fight you
This is where a lot of builds get annoying. A drawer that is too tall wastes space, and one that is too shallow fills up with junk. I like a mix: shallow drawers for drivers, bits, pencils, tape, and layout tools; medium drawers for hand tools; one deep drawer for chargers or heavier accessories. Doors are fine for bulky items, but if you use them for small parts, they become a black hole.
Soft-close hardware is nice, but full-extension matters more. If you cannot see the back of the drawer, you will buy duplicates of the same wrench every year. A workbench with cabinets and drawers earns its keep when you can open one drawer and grab exactly what you need without dumping a tray on the floor. That is the whole game. If the bench slows you down, it is just expensive wall art.
Layout details that save time every week
Think about power before you think about stain. Put outlets above the top, not behind a deep cabinet where a charger cord gets pinched. I like a strip of outlets every four to six feet along a long bench, plus one higher outlet for battery chargers. Good lighting matters too. A pair of LED shop lights overhead and a bright task light at the bench edge will make a cheap top feel better than an expensive one in a dim room.
Dust control is another small thing that pays back. If you use a miter saw nearby, keep the bench out of the direct dust line. Leave a little gap behind the cabinets for cords, air hose, or vacuum hose routing. I also like a slight overhang on the front edge so clamps can bite without fighting the cabinet face. None of this is fancy. It just keeps the shop working instead of getting in your way.
When to build it yourself and when to buy it
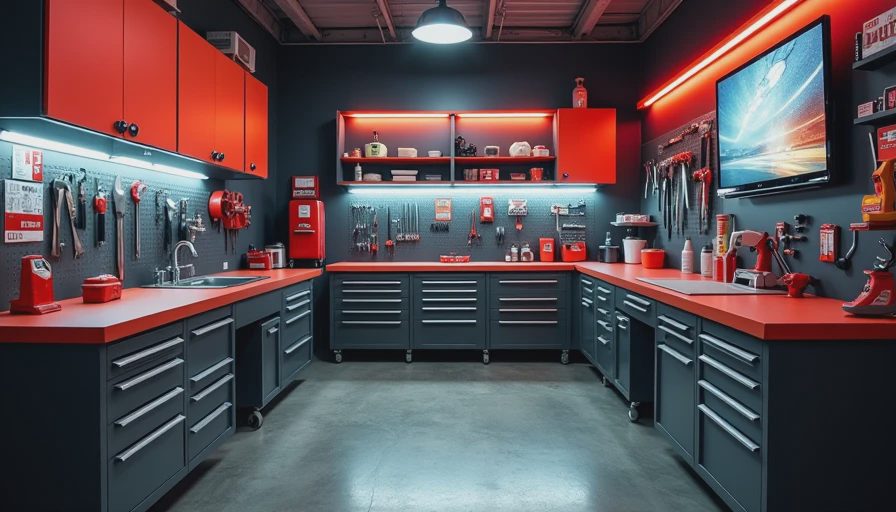
If you already own a saw, a drill, a square, and a weekend, building your own bench makes sense. You can fit the wall exactly, choose the drawer mix you want, and spend money where it matters, usually on slides and a good top. If you want something fast, a prefab setup from a garage storage line can be a smart move, especially when you need a clean install before the rest of the garage is finished. I have used Husky and Gladiator pieces in client garages when the schedule mattered more than custom joinery, and they do the job as long as you understand what you are buying.
My rule is simple: buy if the room is temporary, build if the shop is yours. A permanent garage deserves a bench that matches the wall, the tools, and the way you actually work. That is where a workbench with cabinets and drawers becomes more than storage. It becomes the place where projects start instead of the place where tools go to disappear.
The mistakes I have already paid for
I once painted a plywood top and called it done. Six months later I was scraping glue off and cursing the finish every time I clamped a board. I have also used cheap drawer slides that bowed under real load, and I have built a bench too deep for a one-car garage, which turned the whole wall into dead space. Those mistakes all cost more than doing it right the first time.
If you want the short version, keep the bench shallow enough to move around, stout enough to hold abuse, and simple enough to fix later. Use materials that can take a spilled coffee, a dropped wrench, and a wet winter boot. Build the storage around the tools you reach for every week, not the ones you hope to use someday. That is the setup that stays useful after the newness wears off.
I've screwed this up so you do not have to. Back to the bench.